DRiVER Extras
Download
Release Year
Author
Publisher
Description
Updatesand and additional applications for DRiVER:
Updates:
- Autoloader 1.1
- Kickstart 1.0
Applications:
- Clock
- Calender
- Carfile
- Art Grabber
- Mosaic (by Darren Clarke)
- Paintbursh (Alpha version)
Instructions
DRIVER EXTRAS PACK #1.
By Steve Taylor
Copyright (C) 1994 Revelation Software
Thank you for buying the Driver Extras Pack. I'm sure you'll find that it enhances Driver, as well as offering you additional application software.
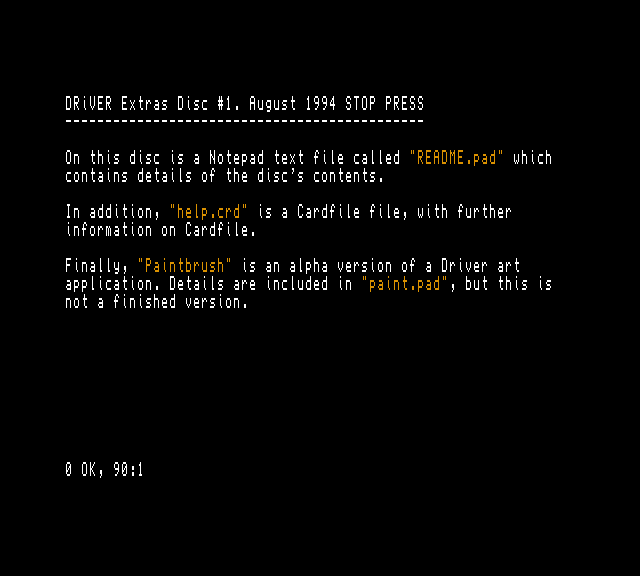
This disc contains version 1.1 of the autoloader (including KICKSTART), three desk accessories (Alarm Clock, Calendar, and Art Grabber), a database called Cardfile and a game, "MOSAIC".
An Alpha version of Paintbrush has also been included on this disc. Revelation make no promises, guarantees or commitment with regard to Paintbrush.
Firstly, make a copy of all the files on the original disc. I would suggest adding them to you Driver working copy:
1. Open File Manager.
2. Format a Ramdisc.
3. Open the Extras disc (make sure it is write-protected).
4. Select all the files.
5. Drag them to the Ramdisc to copy them.
6. Close the extras disc, open the Ramdisc and insert your working copy into drive 1.
7. Select the files and copy them to drive 1.
(Of course, if you have two floppy drives, you don't need to use a Ramdisc)
Finally, create a folder called "Kickstart" in the same place you put the "Kick10.cod" file. You'll see why later on.
AUTOLOADER V1.1, including KICKSTART
This consists of two files. Firstly, there is "Auto11.cod", with which you can replace "Auto10.cod", the autoloader for Driver v1.0. The only noticeable difference between the two is that, after loading the Driver code and graphics, v1.1 also opens a file called "Kick10.cod": version 1.0 of Kickstart.
Kickstart is a utility that will install Driver applications automatically, ready for you to use. Simply put those applications into the "Kickstart" folder you created earlier.
Alternatively, leave the folder empty to avoid installing any applications other than File Manager. However, it can be worthwhile to use this facility for applications and desk-accessories you use frequently (such as Notepad, Calculator and Alarm Clock).
Please note that Kickstart uses 16k of internal RAM whilst it is running, but releases this once all the applications have been loaded. Also, you need the "Kickstart" folder, even if you don't plan to pre-install any applications.
Finally, Kickstart provides a loading screen for Driver, and displays the icons of the applications as they are installed. Kickstart is NOT a Driver application.
ALARM CLOCK
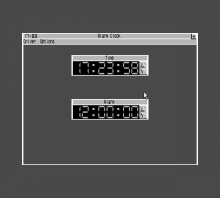
Alarm Clock is a desk-accessory which provides two facilities:
1. For those of you who have a battery-powered clock, such as that on the SAMBUS, it runs a real-time clock in the top-left corner of Driver applications, with an alarm that you can set to go off.
2. More especially for those of you who don't have access to such a clock, it provides an easy way of setting the "clock" for time stamping any files you later create. The Calendar application lets you set the date.
While you have Alarm Clock open, a larger digital display runs in the centre of the screen, and the alarm's time is displayed underneath. To change either of these, point at the digit you wish to alter and click. You can now type the new digit, or use the up/ down arrows to the right to increase/ decrease the value.
The "Options" menu provides three, erm, options:
CLOCK Turns the multi-tasking clock in the top-left on and off.
ALARM Turns the alarm on and off.
RESET ALARM Available once the alarm has been triggered, this will freeze it until tommorow.
Finally, should you forget any of the above, there is on-line help available through the "About Alarm Clock" option in the Driver Menu.
NOTE: DOS Variable DVAR 150 holds the clock port address. If you have no clock, set this to 0 as described in your MasterDOS User's Guide. If you do have a SAMBUS clock, set it to 239. Otherwise, Alarm Clock and Calendar will generate some strange effects!
CALENDAR
Calendar is another simple desk-accessory which will generate a list of days for any month in the next hundred years. The horizontal scroll bar on the month window will change the year, and the vertical bar will alter the month.
The current date is indicated on the relevant calendar in reverse video, and also in another window somewhere on the screen. You can easily change the current date by clicking on a number in the correct month and year.
As with Alarm Clock, make sure that DVAR 150 is correctly set for your clock.
ART GRABBER
Art Grabber is another desk accessory that enables you to cut pieces out of pictures and put them on the clipboard. You can also paste them back in, should you wish, but its main purpose is to allow other applications to use bits of graphics.
Upon opening from disc, Art Grabber will prompt you to open a SCREEN$ file, or a CODE file of similar format. The screens must be in either mode 3 or 4, although they are always displayed in mode 3, the Driver hi-res mode.
The picture is displayed in a large window in the centre of the screen, with scroll bars to let you pan the view as usual. To select an area of the picture, simply click and drag a rectangle to encompass the area, then release.
FILE MENU OPTIONS:
NEW Clears the picture.
OPEN Lets you open a new file.
EDIT MENU OPTIONS:
CUT Cuts outs the selection and puts it on the clipboard.
COPY Copies the selection onto the clipboard.
PASTE Takes a picture from the clipboard and puts it in the picture. You can then drag this to a new position.
MULTIPLE PASTE Lets you paste more than once.
SELECT ALL Selects the whole picture.
CARDFILE
Cardfile is a simple database application, ideal for storing information such as addresses and phone numbers. It mimicks the 7"x5" indexing cards used in places such as libraries, and provides simple and quick referencing.
SCREEN SET-UP
Underneath the usual application name and menus, you'll find the current file name, with two left and right buttons and, at the side, an indication of the top card's number and the total number of used cards in the file.
Beneath this bar, the top six cards are displayed (you can use as many as you like), and at the bottom of the window there's a credit for the software producers.
CARDS
Each card is split into two parts: At the top is the index label, used to sort the cards into alphabetical order. Labels can be up to 32 characters long.
Under this, the main body of the card holds the subject information; there are seven lines of text that you can fill.
To add a card to the file, simply click on a blank one, choose "Add card" from the Edit menu, press [F8], or hold [CTRL] with [+]. In any event, a dialogue box appears prompting you to enter a label for the new card. After you've done this, a blinking cursor will appear in the body of the card, ready for you to enter the details.
The text is edited in the same way as Notepad files: carriage returns and tabs are inserted into the text, although there is no word wrap facility. You can move through the text using the cursor keys, or by clicking to position the cursor. Holding [SHIFT] with the left/ right arrows will skip a word, while [DELETE] will remove characters to the left, and holding [SHIFT] with [DELETE] deletes to the right.
USING THE CLIPBOARD
Select a section of text by clicking and dragging: subsequent typing will replace the selection, and DELETE will erase it. Alternatively, you could cut or copy the selection onto the clipboard via the edit menu or by pressing CTRL-X or CTRL-C respectively. Text can be pasted in from the clipboard by positioning the cursor (or selecting text to replace) and choosing the paste option from the edit menu (CTRL-V).
You can select the whole body of the card by pressing CTRL-A, or by choosing "Select all".
MOVING THROUGH THE FILE
You can bring a card to the front by clicking on it. Alternatively, click on the left and right buttons to cycle through them. Holding [CTRL] with left or right has the same effect.
It is possible to jump directly to a place in the alphabet by pressing a key: Firstly ensure that there is no flashing cursor by pressing [EDIT].
OTHER CARD MANIPULATIONS
To delete the top card in the file, choose the "Delete card" option from the edit menu, press [F7] or hold [CTRL] WITH [-]. You will be asked to confirm the action.
You can change the card's index label by either double clicking on it, holding CTRL-L or choosing "Change label" from the edit menu. A dialogue box appears with the existing label. The cards will be automatically sorted back into alphabetical order.
FILE OPERATIONS
The file menu offers the usual "New" (CNTRL-N), "Open" (CTRL-O), "Save" (CTRL-S) and "Save as" options.
TECHNICAL INFORMATION
Each card is stored in 256 bytes. The first 32 bytes hold the index label, terminated by a carriage return, CHR$(13). The next 224 hold the body, terminated by CHR$(255) FFhex. The only restriction to the number of cards is available memory.
MOSAIC
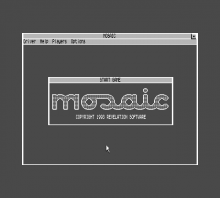
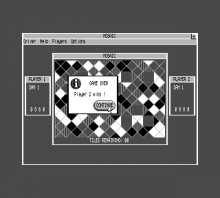
Full instructions for Mosaic are included in the game's HELP menu. The original non-Driver version of Mosaic first appeared on FRED 36. Unlike the rest of this disc, this game was written by Darren Clarke.
PAINTBRUSH
Paintbrush is a sophisticated art package that fully utilises the Driver environment to let you create and manipulate images quickly and easily.
SCREEN SET-UP
Below the application title and menu bar, there are five windows:
TOOLBOX. Situated to the left under the Driver menu, this contains icons for the various tools at your disposal. In order from top-left to bottom-right, these tools are as follows...
1. Pointer. Use this to select areas of the picture, by clicking and dragging rectangular areas. To cancel a selection, click somewhere else in the picture, or click and drag a new selection. You can cut and copy selections through the 'Edit' menu (see later).
2. Text. This tool lets you insert text, of various shapes and sizes, into the picture. Simply click the caret where you want the text to start, and type it in. The 'Font', 'Size' and 'Style' menus are explained later and alter the way the text is displayed. ** NOT AVAILABLE IN V1.0a **
3. Spraycan. Produces a semi-random 'spraybrush' effect on the picture. Simply click on the picture to spray the can using the current brush size. The button you press will determine the colour. (left = pen; right = paper)
4. Brush. Produces a more solid effect than the spraycan. Click and drag the pointer (with the same button as above) to brush paint onto the picture, using the current brush size.
5. Line. Draws straight lines using the current width. Click in the picture to fix one end of the line, then drag the other end until you are happy, and release the mouse button. This technique is known as RUBBER BANDING, and is used in other Paintbrush tools.
6. Roller. This will flood-fill the area where you click, using whichever colour is associated with the button you press.
7. Circle. Click in the picture to fix the centre of the circle (with the button to indicate colour as before), then drag the edge out before finally releasing to fix the circle in position. The current brush size is used.
8. Filled circle. As above, except that the final circle is drawn in the pen colour and filled in the middle with the paper colour.
9. Box. Click to fix one corner, then drag the opposite corner out before finally releasing the button to fix it. Colour and size as for the unfilled circle.
10. Filled box. As above, except that the box is filled as for the filled circle.
You can select a tool by clicking on its icon in the toolbox - the currently selected tool is highlighted.
PICTURE. The large window to the right of the toolbox displays the current picture. The scroll bars at the right and bottom pan the view as you would expect.
BRUSH SIZE. Under the toolbox, another window shows you the various brush sizes available (from 1 to 7 points), with the current brush size pointed to by an arrow. You can change this by clicking on the line corresponding to a new size.
PEN AND PAPER. In the bottom left, a small square window shows you the current paper (fill) colour or pattern surrounded by the pen (outline) colour. Change these by clicking with the relevant button on the palette.
PALETTE. Underneath the picture, the palette displays all the available colours and mixes. You can identify one of these as the paper by clicking on it with th right mouse button - the left button is used for the pen.
CHANGING THE VIEW
The picture window has four modes of magnification. In the normal mode, all the tools can be used, and the scroll bars must be used to see the whole thing.
You can zoom out from this view to see a reduced picture. This cannot be edited in any way, but lets you see everything.
If, instead, you zoom in, you can see the picture magnified twice or four times. In this mode, the toolbox is, again, inactive, but you can edit individual pixels. There are "Zoom in" and "Zoom out" options (CTRL with -/+) in the 'Edit' menu.
In addition to the magnification, the 'Screen' menu gives you three display options:
1. Hi-res Driver. Essentially, mode 3. The pixels are "thin", and are edited as such.
2. Lo-res Driver. This is the default setting, using a mode 3 hi-resolution display with "fat" pixels.
3. Lo-res Colour. Mode 4, fat pixels and 16 colours. Unfortunately, Driver does not run very well in mode 4, and several compromises have been made which might seem slightly "untidy". The lo-res Driver mode is provided to let you edit a mode 4 screen without these problems.
FILE OPERATIONS
The file menu gives you options for opening, saving, printing and starting a new picture as you would expect.
THE EDIT MENU
Zoom in/ Zoom out. See CHANGING THE DISPLAY.
Cut/ copy. Cuts or copies the selection onto the clipboard.
Paste/ Multiple paste. Pastes whatever picture is on the clipboard into the picture. Click and drag it to fix the position.
Select All. Selects the whole picture.

